[toc]
安装及配置
官网下载 devco,一路 continue
然后会让选择 node 版本,需要$>16<18$ 所以这个时候要下载一个fnm
然后使用 fnm 来切换版本
PS C:\Users> fnm ls
* v16.20.2
* v18.17.1 default, lts-latest
* system
fnm -v
快速使用 arkts 创建一个基础项目(stage 模型)
ArkTS 工程目录结构(Stage 模型)
AppScope > app.json5:应用的全局配置信息。
entry:OpenHarmony 工程模块,编译构建生成一个HAP包。
- src > main > ets:用于存放 ArkTS 源码。
- src > main > ets > entryability:应用/服务的入口。
- src > main > ets > pages:应用/服务包含的页面。
- src > main > resources:用于存放应用/服务所用到的资源文件,如图形、多媒体、字符串、布局文件等。关于资源文件,详见资源文件的分类。
- src > main > module.json5:模块配置文件。主要包含 HAP 的配置信息、应用/服务在具体设备上的配置信息以及应用/服务的全局配置信息。具体的配置文件说明,详见module.json5 配置文件。
- build-profile.json5:当前的模块信息 、编译信息配置项,包括 buildOption、targets 配置等。其中 targets 中可配置当前运行环境,默认为 HarmonyOS。若需开发 OpenHarmony 应用,则需开发者自行修改为 OpenHarmony。
- hvigorfile.ts:模块级编译构建任务脚本,开发者可以自定义相关任务和代码实现。
oh_modules:用于存放三方库依赖信息。关于原 npm 工程适配 ohpm 操作,请参考历史工程手动迁移。
build-profile.json5:应用级配置信息,包括签名、产品配置等。
hvigorfile.ts:应用级编译构建任务脚本。
构建第一个页面
使用文本组件。
工程同步完成后,在“Project”窗口,点击“entry > src > main > ets > pages”,打开“Index.ets”文件,可以看到页面由 Text 组件组成。“Index.ets”文件的示例如下:
// Index.ets
@Entry
@Component
struct Index {
  @State message: string = 'Hello World'

  build() {
    Row() {
      Column() {
        Text(this.message)
          .fontSize(50)
          .fontWeight(FontWeight.Bold)
      }
      .width('100%')
    }
    .height('100%')
  }
}
ts
添加按钮。
在默认页面基础上,我们添加一个 Button 组件,作为按钮响应用户点击,从而实现跳转到另一个页面。“Index.ets”文件的示例如下:
// Index.ets
@Entry
@Component
struct Index {
  @State message: string = 'Hello World'

  build() {
    Row() {
      Column() {
        Text(this.message)
          .fontSize(50)
          .fontWeight(FontWeight.Bold)
        // 添加按钮,以响应用户点击
        Button() {
          Text('Next')
            .fontSize(30)
            .fontWeight(FontWeight.Bold)
        }
        .type(ButtonType.Capsule)
        .margin({
          top: 20
        })
        .backgroundColor('#0D9FFB')
        .width('40%')
        .height('5%')
      }
      .width('100%')
    }
    .height('100%')
  }
}
ts
在编辑窗口右上角的侧边工具栏,点击 Previewer,打开预览器。第一个页面效果如下图所示:
 构建第二个页面
创建第二个页面。
- 新建第二个页面文件。在“Project”窗口,打开“entry > src > main > ets”,右键点击“pages”文件夹,选择“New > ArkTS File”,命名为“Second”,点击“Finish”。可以看到文件目录结构如下:

说明:
开发者也可以在右键点击“pages”文件夹时,选择“New > Page”,则无需手动配置相关页面路由。
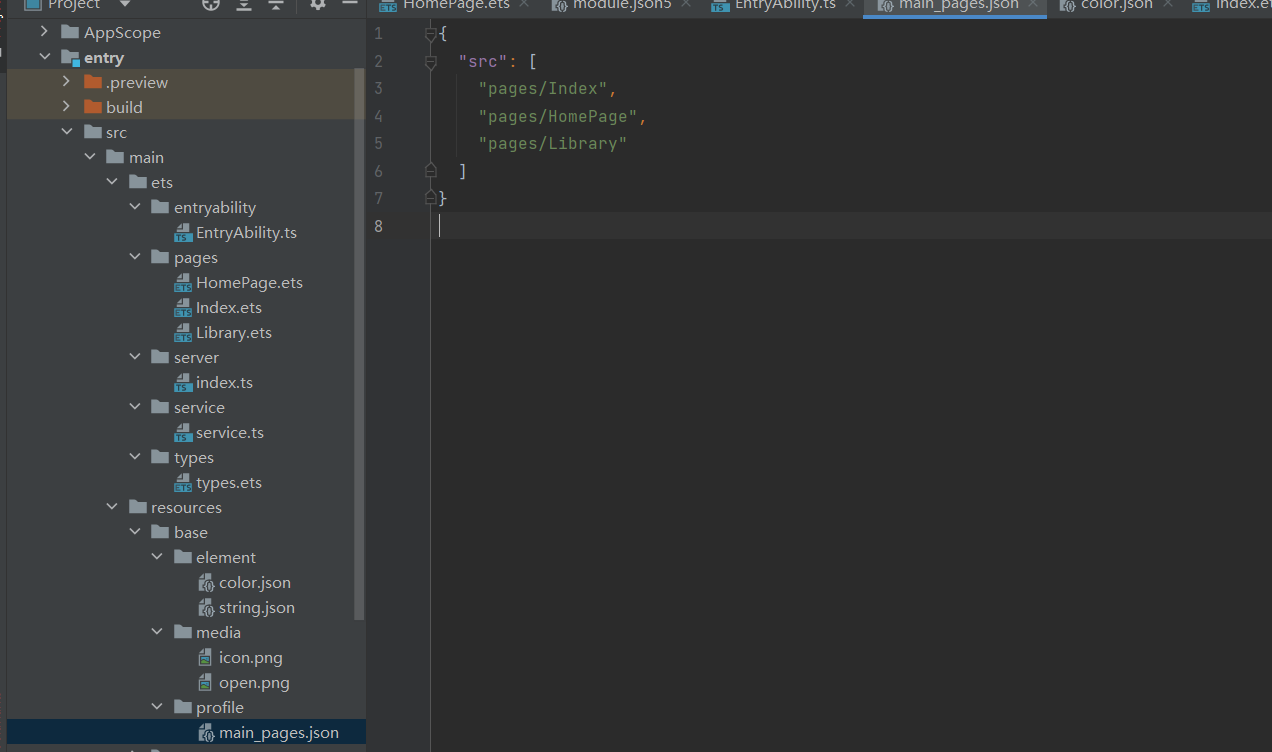
- 配置第二个页面的路由。在“Project”窗口,打开“entry > src > main > resources > base > profile”,在 main_pages.json 文件中的“src”下配置第二个页面的路由“pages/Second”。示例如下:
{
  "src": [
    "pages/Index",
    "pages/Second"
  ]
}
json
- 新建第二个页面文件。在“Project”窗口,打开“entry > src > main > ets”,右键点击“pages”文件夹,选择“New > ArkTS File”,命名为“Second”,点击“Finish”。可以看到文件目录结构如下:
添加文本及按钮。
参照第一个页面,在第二个页面添加 Text 组件、Button 组件等,并设置其样式。“Second.ets”文件的示例如下:
// Second.ets
@Entry
@Component
struct Second {
  @State message: string = 'Hi there'

  build() {
    Row() {
      Column() {
        Text(this.message)
          .fontSize(50)
          .fontWeight(FontWeight.Bold)
        Button() {
          Text('Back')
            .fontSize(25)
            .fontWeight(FontWeight.Bold)
        }
        .type(ButtonType.Capsule)
        .margin({
          top: 20
        })
        .backgroundColor('#0D9FFB')
        .width('40%')
        .height('5%')
      }
      .width('100%')
    }
    .height('100%')
  }
}
ts
实现页面间的跳转
页面间的导航可以通过页面路由 router来实现。页面路由 router 根据页面 url 找到目标页面,从而实现跳转。使用页面路由请导入 router 模块。
第一个页面跳转到第二个页面。
在第一个页面中,跳转按钮绑定 onClick 事件,点击按钮时跳转到第二页。“Index.ets”文件的示例如下:
// Index.ets
// 导入页面路由模块
import router from '@ohos.router';

@Entry
@Component
struct Index {
  @State message: string = 'Hello World'

  build() {
    Row() {
      Column() {
        Text(this.message)
          .fontSize(50)
          .fontWeight(FontWeight.Bold)
        // 添加按钮,以响应用户点击
        Button() {
          Text('Next')
            .fontSize(30)
            .fontWeight(FontWeight.Bold)
        }
        .type(ButtonType.Capsule)
        .margin({
          top: 20
        })
        .backgroundColor('#0D9FFB')
        .width('40%')
        .height('5%')
        // 跳转按钮绑定onClick事件,点击时跳转到第二页
        .onClick(() => {
          console.info(`Succeeded in clicking the 'Next' button.`)
         // 跳转到第二页
           router.pushUrl({ url: 'pages/Second' }).then(() => {
             console.info('Succeeded in jumping to the second page.')
           }).catch((err) => {
             console.error(`Failed to jump to the second page.Code is ${err.code}, message is ${err.message}`)
           })
        })
      }
      .width('100%')
    }
    .height('100%')
  }
}
ts
第二个页面返回到第一个页面。
在第二个页面中,返回按钮绑定 onClick 事件,点击按钮时返回到第一页。“Second.ets”文件的示例如下:
// Second.ets
// 导入页面路由模块
import router from '@ohos.router';

@Entry
@Component
struct Second {
  @State message: string = 'Hi there'

  build() {
    Row() {
      Column() {
        Text(this.message)
          .fontSize(50)
          .fontWeight(FontWeight.Bold)
        Button() {
          Text('Back')
            .fontSize(25)
            .fontWeight(FontWeight.Bold)
        }
        .type(ButtonType.Capsule)
        .margin({
          top: 20
        })
        .backgroundColor('#0D9FFB')
        .width('40%')
        .height('5%')
        // 返回按钮绑定onClick事件,点击按钮时返回到第一页
        .onClick(() => {
          console.info(`Succeeded in clicking the 'Back' button.`)
          try {
            // 返回第一页
            router.back()
            console.info('Succeeded in returning to the first page.')
          } catch (err) {
            console.error(`Failed to return to the first page.Code is ${err.code}, message is ${err.message}`)
          }
        })
      }
      .width('100%')
    }
    .height('100%')
  }
}
ts
使用真机运行应用

在 settings 里面勾这个,然后在虚拟机那里下载本地虚拟机(9gwtf),然后就能跑虚拟机了
想在虚拟机上运行就点击右上角的绿色 run 箭头就可以
路由跳转
对于那种登录或者起始页,跳转后最好使用 replaceUrl,这样子的话会自动清栈,然后返回不了这个页面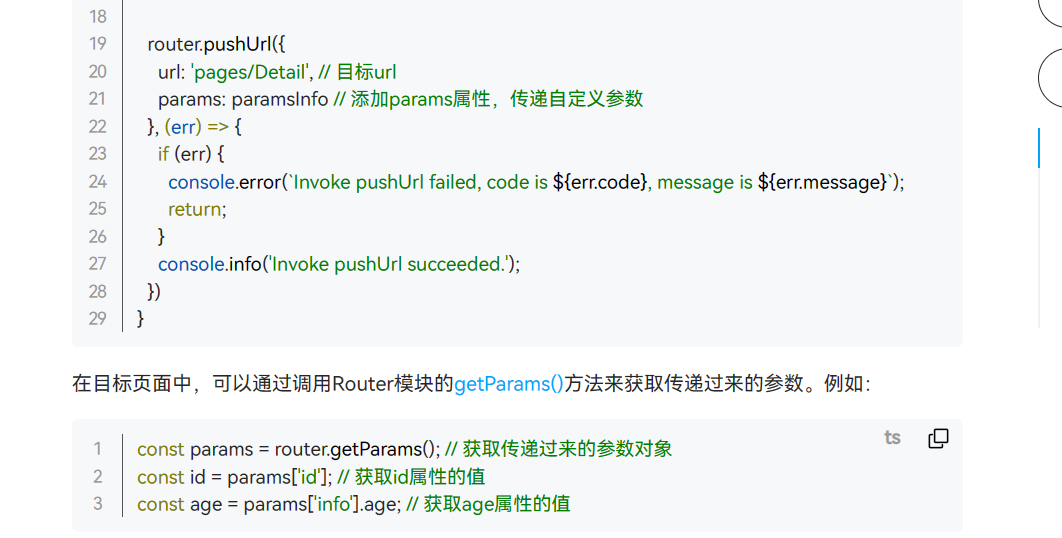
!注意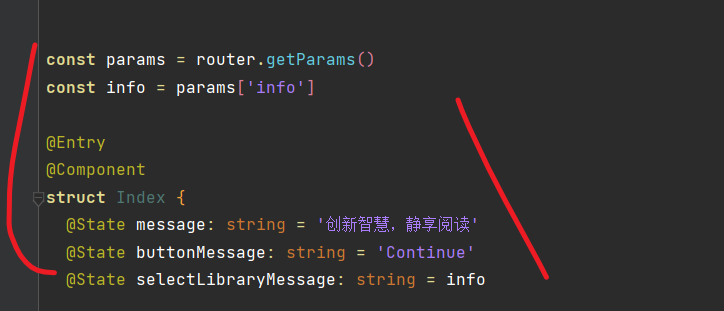
这玩意在传值的时候要先用 const 去接,然后再赋值,不然就会一直找不到。。。rnm 的鸿蒙
新遇到一个离谱的
路由的路径原本可以使用相对路径的,但是不知道怎的,会提示找不到页面,也已经注册了,然后绝对路径也不行,只能使用一个四不像的路径,否则就不给跳了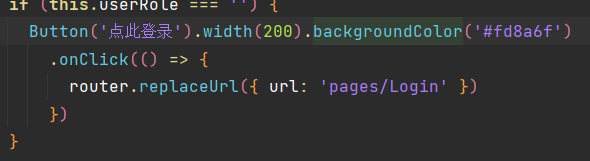
arkTs 语法
关于 homo 本地存储的使用
http://docs.openharmony.cn/pages/v3.2/zh-cn/application-dev/quick-start/arkts-appstorage.md/
AppStorage
这玩意相当于 vue 里面的仓库全局可以使用,但是比较麻烦
在 ui 界面中要想使用的话必须使用
@StorageProp 或者@StorageLink来和本地的值做一个绑定,prop 能读不能改,link 双向绑定
AppStorage.set('xx',xx)
@Entry
 @StorageLink('role') userRole: string = ''
  @StorageLink('avatar') userAvatar: string = ''
persistStorage
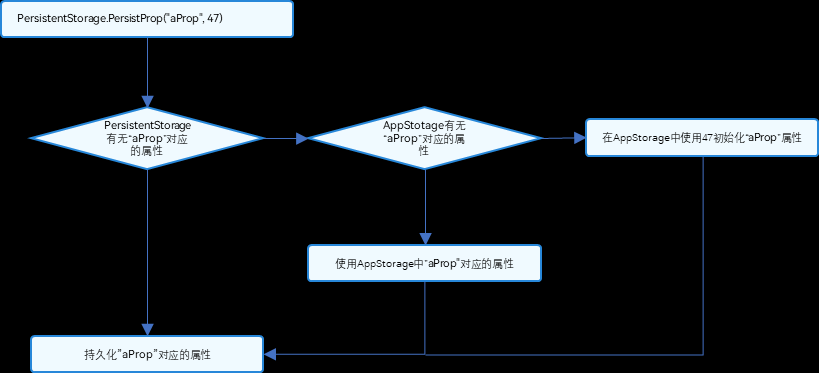
这里就相当于是持久化存储,可以拿来存 token 和一些固定的属性,直接写进磁盘,只有应用卸载或重新 build 的时候才会被删掉
用法
必须先声明要使用持久化存储,然后会自动判断在 Appstorage 里有没有这个项,没有就生成,有就更新什么的,在重开的时候也会保存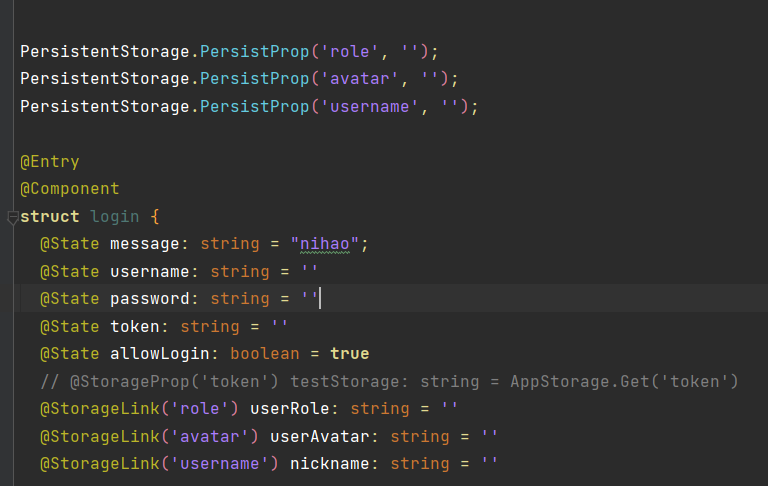
PersistentStorage.PersistProp('role', '');
PersistentStorage.PersistProp('avatar', '');
PersistentStorage.PersistProp('username', '');

@Entry
@Component
struct login {
  @State message: string = "nihao";
  @State username: string = ''
  @State password: string = ''
  @State token: string = ''
  @State allowLogin: boolean = true
  // @StorageProp('token') testStorage: string = AppStorage.Get('token')
  @StorageLink('role') userRole: string = ''
  @StorageLink('avatar') userAvatar: string = ''
  @StorageLink('username') nickname: string = ''
组件参考
线性布局
这玩意就是 column,row,也就是行列布局,自带 flex,row 布局的话就是一列,然后垂直结构,column 布局就是一行,然后水平结构
行里可以套列,列里也可以套行,然后也可以行套行
使用 justify 和 align
- .justifyContent(FlexAlign.Center)
- .alignItems(VerticalAlign.Center)
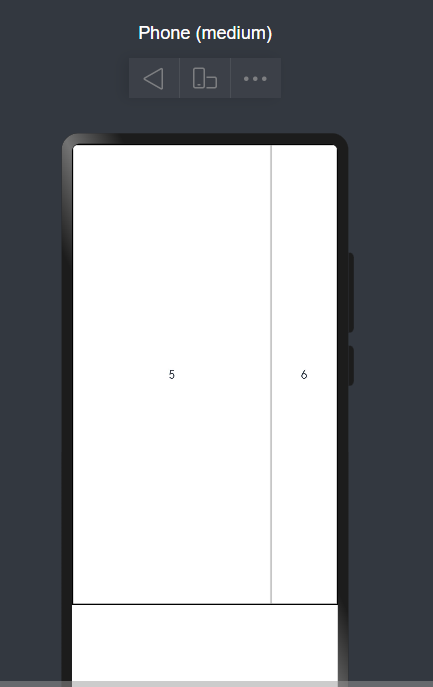
grid
Grid() {
        ForEach(this.counts, (count: number) => {
          GridItem() {
            Text(count.toString())
            // Image($r('app.media.student'))
          }.border({ width: 1, color: ($r('app.color.border_shadow1')) })
        })

      }
      .rowsTemplate('0fr 2fr 0fr')
      .border({ width: 1 })
      .columnsTemplate('0fr 3fr 1fr')

    }
border
边框老麻烦,使用 border 的话要注意,在里面有很多属性,width,color,然后在 width 里面的话,也需要再套一层花括号
// xxx.ets
@Entry
@Component
struct BorderExample {
  build() {
    Column() {
      Flex({ justifyContent: FlexAlign.SpaceAround, alignItems: ItemAlign.Center }) {
        // 线段
        Text('dashed')
          .borderStyle(BorderStyle.Dashed).borderWidth(5).borderColor(0xAFEEEE).borderRadius(10)
          .width(120).height(120).textAlign(TextAlign.Center).fontSize(16)
        // 点线
        Text('dotted')
          .border({ width: 5, color: 0x317AF7, radius: 10, style: BorderStyle.Dotted })
          .width(120).height(120).textAlign(TextAlign.Center).fontSize(16)
      }.width('100%').height(150)

      Text('.border')
        .fontSize(50)
        .width(300)
        .height(300)
        .border({
          width: { left: '5lpx', right: '10lpx', top: '20lpx', bottom: '30lpx' },
          color: { left: '#e3bbbb', right: Color.Blue, top: Color.Red, bottom: Color.Green },
          radius: { topLeft: 10, topRight: 20, bottomLeft: 40, bottomRight: 80 },
          style: {
            left: BorderStyle.Dotted,
            right: BorderStyle.Dotted,
            top: BorderStyle.Solid,
            bottom: BorderStyle.Dashed
          }
        }).textAlign(TextAlign.Center)
    }
  }
}
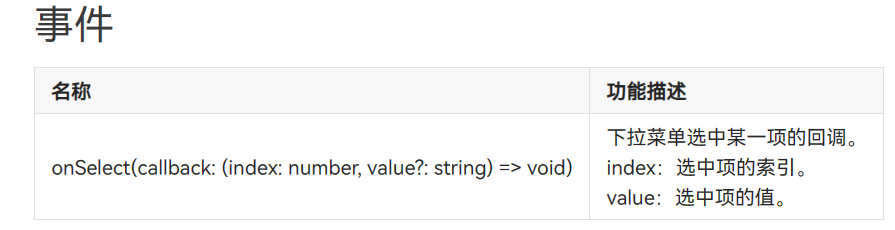
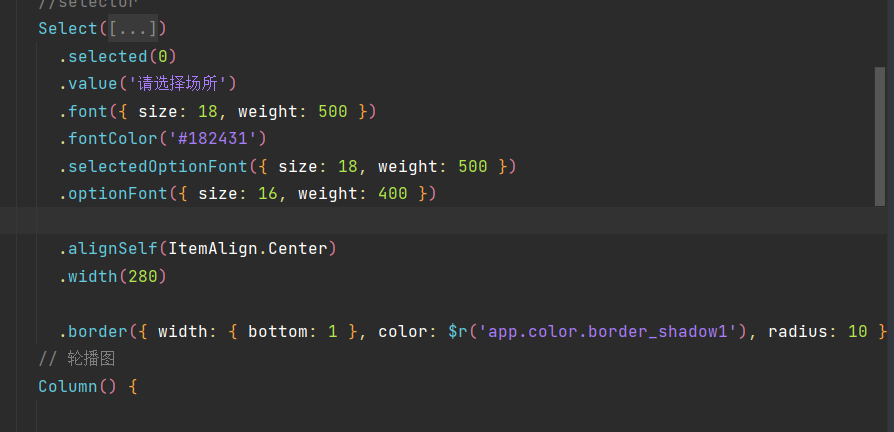
Select
promptAction
toast 弹出框,好用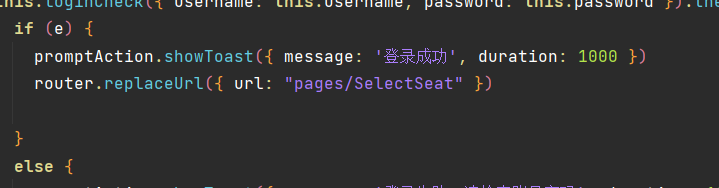
基础的必须理解的
页面结构
关于如何将首页变成自定义的页面
在入口 ability 里改,然后记得在页面里要注册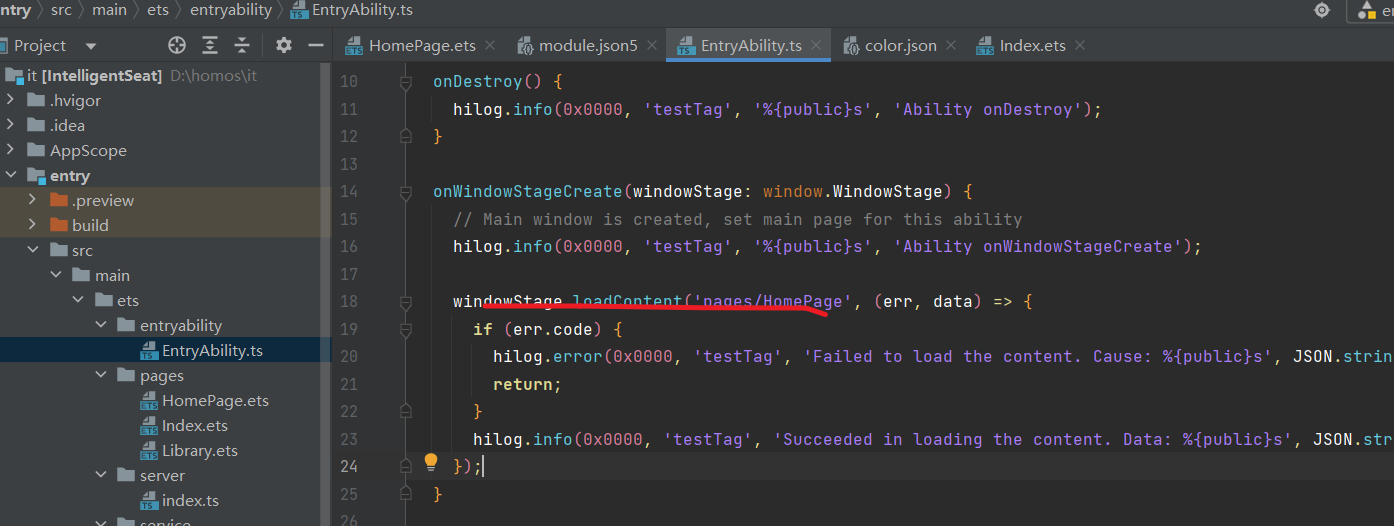
获取权限的方法
在 sb 的 module.json5 里配置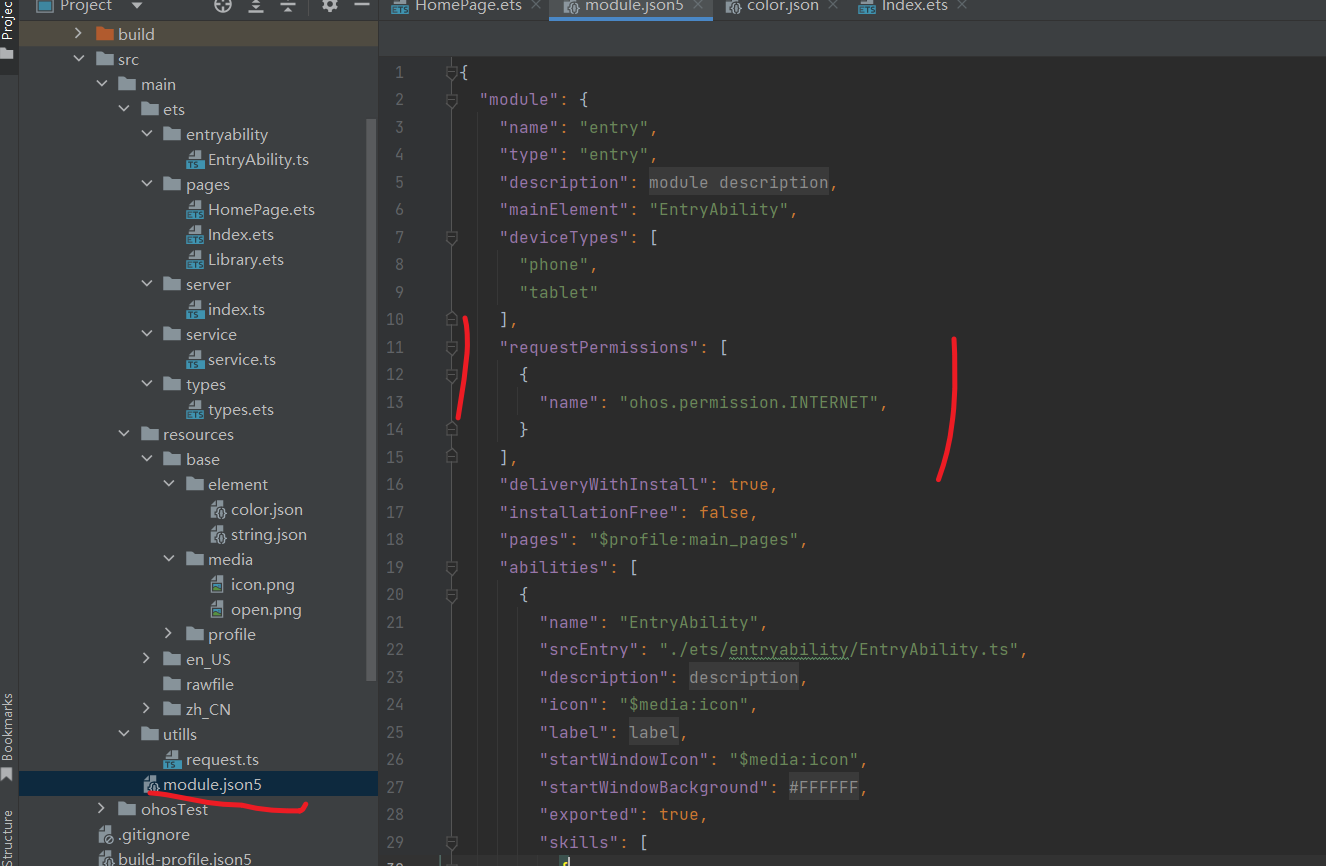
具体属性看官方文档
如何引入资源文件
- 访问应用资源
在工程中,通过"$r('app.type.name')"的形式引用应用资源。app 代表是应用内 resources 目录中定义的资源;type 代表资源类型(或资源的存放位置),可以取“color”、“float”、“string”、“plural”、“media”,name 代表资源命名,由开发者定义资源时确定。
引用 rawfile 下资源时使用"$rawfile('filename')"的形式,filename 需要表示为 rawfile 目录下的文件相对路径,文件名需要包含后缀,路径开头不可以以"/"开头。
访问 rawfile 文件的 descriptor 时,可使用资源管理 getRawFd 接口,其返回值 descriptor.fd 为 hap 包的 fd,访问此 rawfile 文件需要结合{fd, offset, length}一起使用。
资源描述符不能拼接使用,仅支持普通字符串如'app.type.name'。
$r 返回值为 Resource 对象,可通过 getStringValue 方法获取对应的字符串。
在 xxx.ets 文件中,可以使用在 resources 目录中定义的资源。资源分类中资源组目录下的“资源文件示例”显示了.json 文件内容,包含 color.json 文件、string.json 文件和 plural.json 文件。资源的具体使用方法如下:
Text($r("app.string.string_hello"))
  .fontColor($r("app.color.color_hello"))
  .fontSize($r("app.float.font_hello"));

Text($r("app.string.string_world"))
  .fontColor($r("app.color.color_world"))
  .fontSize($r("app.float.font_world"));

// 引用 string.json 资源。Text 中$r的第一个参数指定string资源,第二个参数用于替换string.json文件中的%s。
//如下示例代码value为"We will arrive at five of the clock"。
Text($r("app.string.message_arrive", "five of the clock"))
  .fontColor($r("app.color.color_hello"))
  .fontSize($r("app.float.font_hello"));

// 引用 plural$资源。Text中$r 的第一个指定 plural 资源,第二个参数用于指定单复数(在中文,单复数均使用 other。在英文,one:代表单数,取值为 1;other:代表复数,取值为大于等于 1 的整数),第三个参数用于替换%d
// 如下示例代码为复数,value 为"5 apples"。
Text($r("app.plural.eat_apple", 5, 5))
  .fontColor($r("app.color.color_world"))
  .fontSize($r("app.float.font_world"));

Image($r("app.media.my_background_image")); // media资源的$r 引用

Image($rawfile("test.png")); // rawfile$r 引用 rawfile 目录下图片

Image($rawfile("newDir/newTest.png")); // rawfile$r 引用 rawfile 目录下图片
ts;
Text($r("app.string.string_hello"))
  .fontColor($r("app.color.color_hello"))
  .fontSize($r("app.float.font_hello"));

Text($r("app.string.string_world"))
  .fontColor($r("app.color.color_world"))
  .fontSize($r("app.float.font_world"));

// 引用 string.json 资源。Text 中$r的第一个参数指定string资源,第二个参数用于替换string.json文件中的%s。
//如下示例代码value为"We will arrive at five of the clock"。
Text($r("app.string.message_arrive", "five of the clock"))
  .fontColor($r("app.color.color_hello"))
  .fontSize($r("app.float.font_hello"));

// 引用 plural$资源。Text中$r 的第一个指定 plural 资源,第二个参数用于指定单复数(在中文,单复数均使用 other。在英文,one:代表单数,取值为 1;other:代表复数,取值为大于等于 1 的整数),第三个参数用于替换%d
// 如下示例代码为复数,value 为"5 apples"。
Text($r("app.plural.eat_apple", 5, 5))
  .fontColor($r("app.color.color_world"))
  .fontSize($r("app.float.font_world"));

Image($r("app.media.my_background_image")); // media资源的$r 引用

Image($rawfile("test.png")); // rawfile$r 引用 rawfile 目录下图片

Image($rawfile("newDir/newTest.png")); // rawfile$r 引用 rawfile 目录下图片
系统资源
系统资源包含色彩、圆角、字体、间距、字符串及图片等。通过使用系统资源,不同的开发者可以开发出具有相同视觉风格的应用。
开发者可以通过“$r('sys.type.resource_id')”的形式引用系统资源。sys 代表是系统资源;type 代表资源类型,可以取“color”、“float”、“string”、“media”;resource_id 代表资源 id。
可以查看应用 UX 设计中关于资源的介绍,获取 OpenHarmony 支持的系统资源 ID 及其在不同配置下的取值。
说明:
仅声明式开发范式支持使用系统资源,类 Web 开发范式不支持。
可以查看 OpenHarmony/resources 代码仓了解系统预置资源的实现,这里的目录结构与工程中的 resources 目录类似,也是通过资源限定词匹配不同的设备或设备状态。
系统资源的使用场景、id、参数详细对照表详见 OpenHarmony_系统资源分层设计表_V1.0.xlsm
Text("Hello")
  .fontColor($r("sys.color.ohos_id_color_emphasize"))
  .fontSize($r("sys.float.ohos_id_text_size_headline1"))
  .fontFamily($r("sys.string.ohos_id_text_font_family_medium"))
  .backgroundColor($r("sys.color.ohos_id_color_palette_aux1"));

Image($r("sys.media.ohos_app_icon"))
  .border({
    color: $r("sys.color.ohos_id_color_palette_aux1"),
    radius: $r("sys.float.ohos_id_corner_radius_button"),
    width: 2,
  })
  .margin({
    top: $r("sys.float.ohos_id_elements_margin_horizontal_m"),
    bottom: $r("sys.float.ohos_id_elements_margin_horizontal_l"),
  })
  .height(200)
  .width(300);
动手时遇到的好多好多问题,sbhomo!垃圾社区
关于 websocket 的问题
ws,的 on('message',(err,value))能发送的数据只有 string 和 arraybuffer,所以要用 JSON.parse(value)来得到值